Office 365 - Outlook Web Access (OWA) - Sending an Email to a Contact List
Estimated Reading Time: 1 Minutes| 2017 |
Office 365 - Outlook Web Access (OWA) - Sending an Email to a Contact List
| This article will provide you with directions on how to send an email to a Contact List. |
| 1. Login to the portal using your College username and password. Click on the Quick Links drop down menu and select the Employee Email link. |
|
|
| 2. In the upper left corner, click New to create a new email message. |
|
|
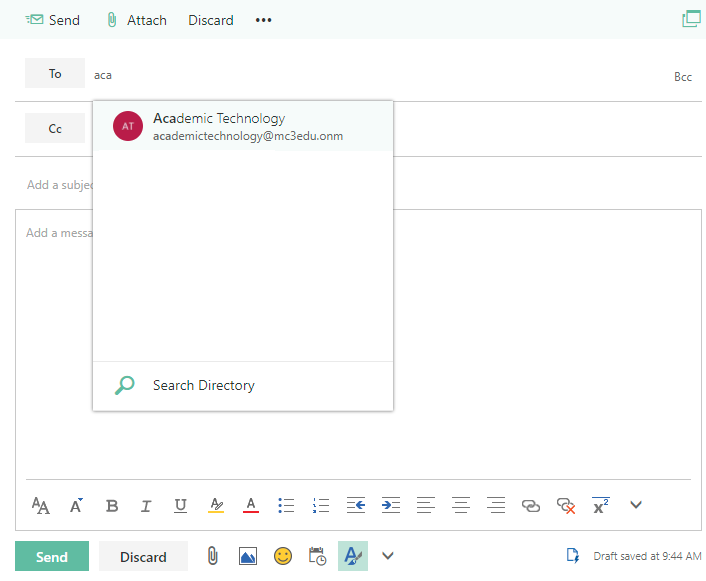
| 3. A new email message window will appear on the right side of your screen. In the To: line, begin typing the name of the Contact List you created. A drop down menu will appear showing you options to select from. Click the Contact List that you want to send a message to. |  |
|
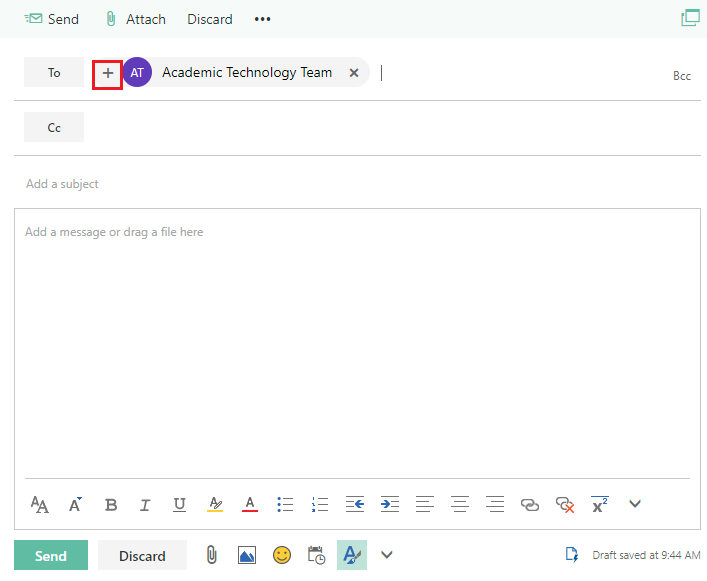
| 4. The Contact List will now be in the To: line of your email message. If you want to expand the Contact List to see the Contact List members, click the + next to the Contact List name. |
|
|
|
5. When you are finished composing your message, click Send. Your email message will send to everyone in your Contact List. |
||

