Faculty - Creating Student Group spaces within Teams
Estimated Reading Time: 2 Minutes| 2024 |
Faculty - Creating Student Group Spaces within Teams Classroom
| Instructions |
Images for Instructions |
| 1. Open the Canvas course and select Settings. | |
|
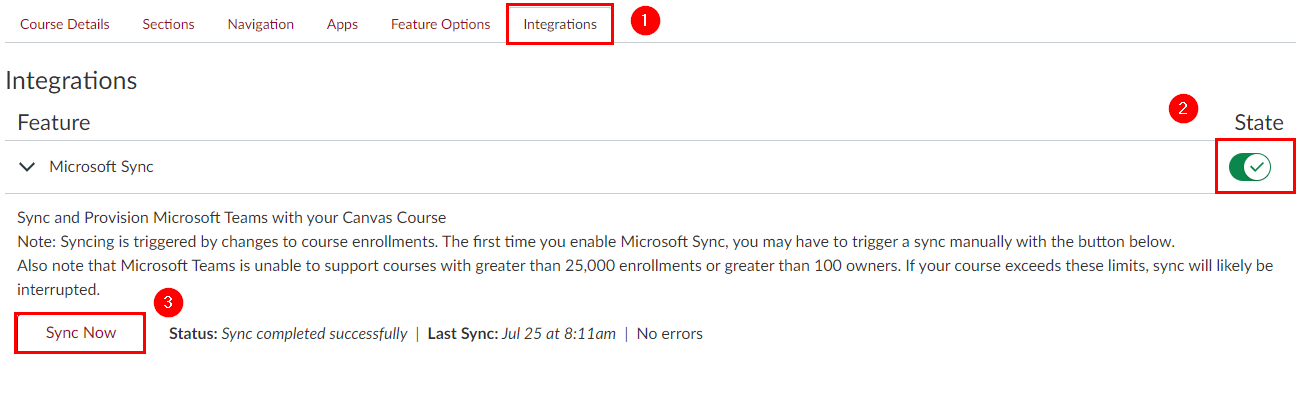
2. Select theIntegrationstab (see image - circle 1) 3. Select the enableMicrosoft Syncbutton (see image - circle 2) 4. Select Sync Now (see image - circle 3). |
|
|
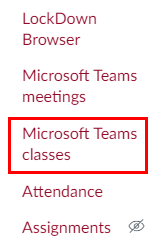
5. On the menu, select Microsoft Teams classes. |
|
|
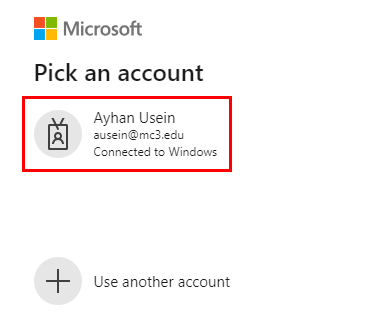
6. When prompted, select Sign In. |
|
| 7. Sign in using your @mc3.edu email address. |
|
|
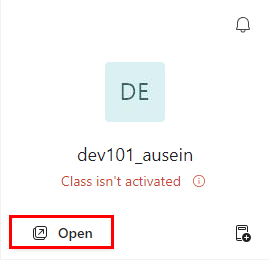
8. SelectOpenunder the course name. |
|
|
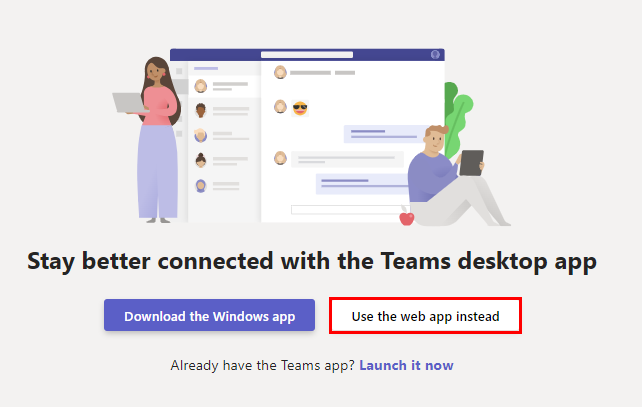
9. SelectUse the web app instead. Note: If a pop-up appears on the screen, select Cancel. Note: If you receive an error message saying to try again, go to Montco Connect, select Office 365, and locate Microsoft Teams. Select Teams on the Teams menu, locate the course, and select Activate. Once Active is selected, it cannot be undone. If these steps were followed, skip to step 11. |
|
|
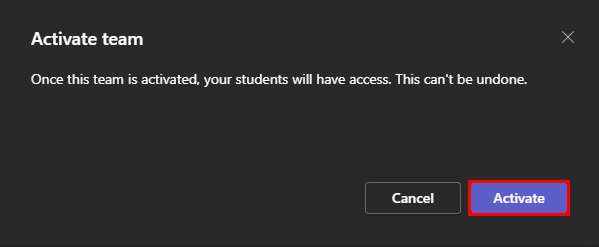
10. The Team associated with the course will appear. To activate this team, selectActivate at the top of the Teams page. Note:Once selecting Activate, the process cannot be undone. |
Or
|
|
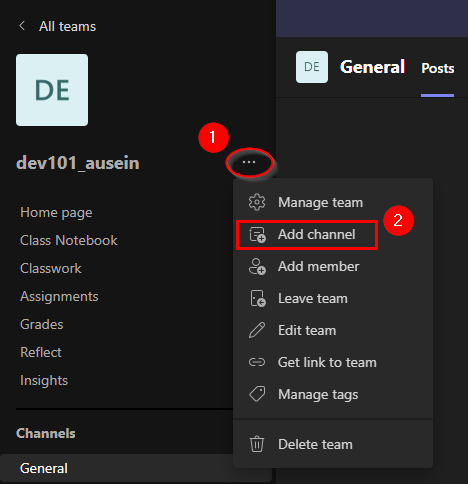
11. To start creating a group space for your students, select the ... (three dots) next to the name of your course (see image - circle 1). 12. From the menu, selectAdd Channel (see image - circle 2). |
|
|
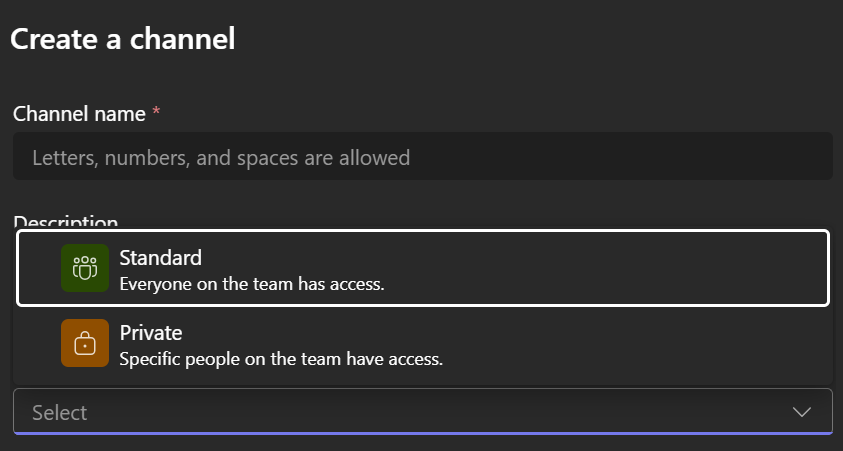
13. Name the group under Channel Name. 14. Under Privacy settings, selectStandard - Everyone on the Team has access. 15. Select Create. Note:Steps 11-15 will need to be repeated for each group. |
|
|
Note: If prompted to add student names or the group name appears under "Main Channel" and has a lock next to it, the lock indicates that private was selected instead of standard. Delete the channel by selecting the ... (three dots) and select Delete Channel. If there is no lock, the channel is created, and all participants can see the space. Note: Select the Channel with the group name to enter the space. |
|
|
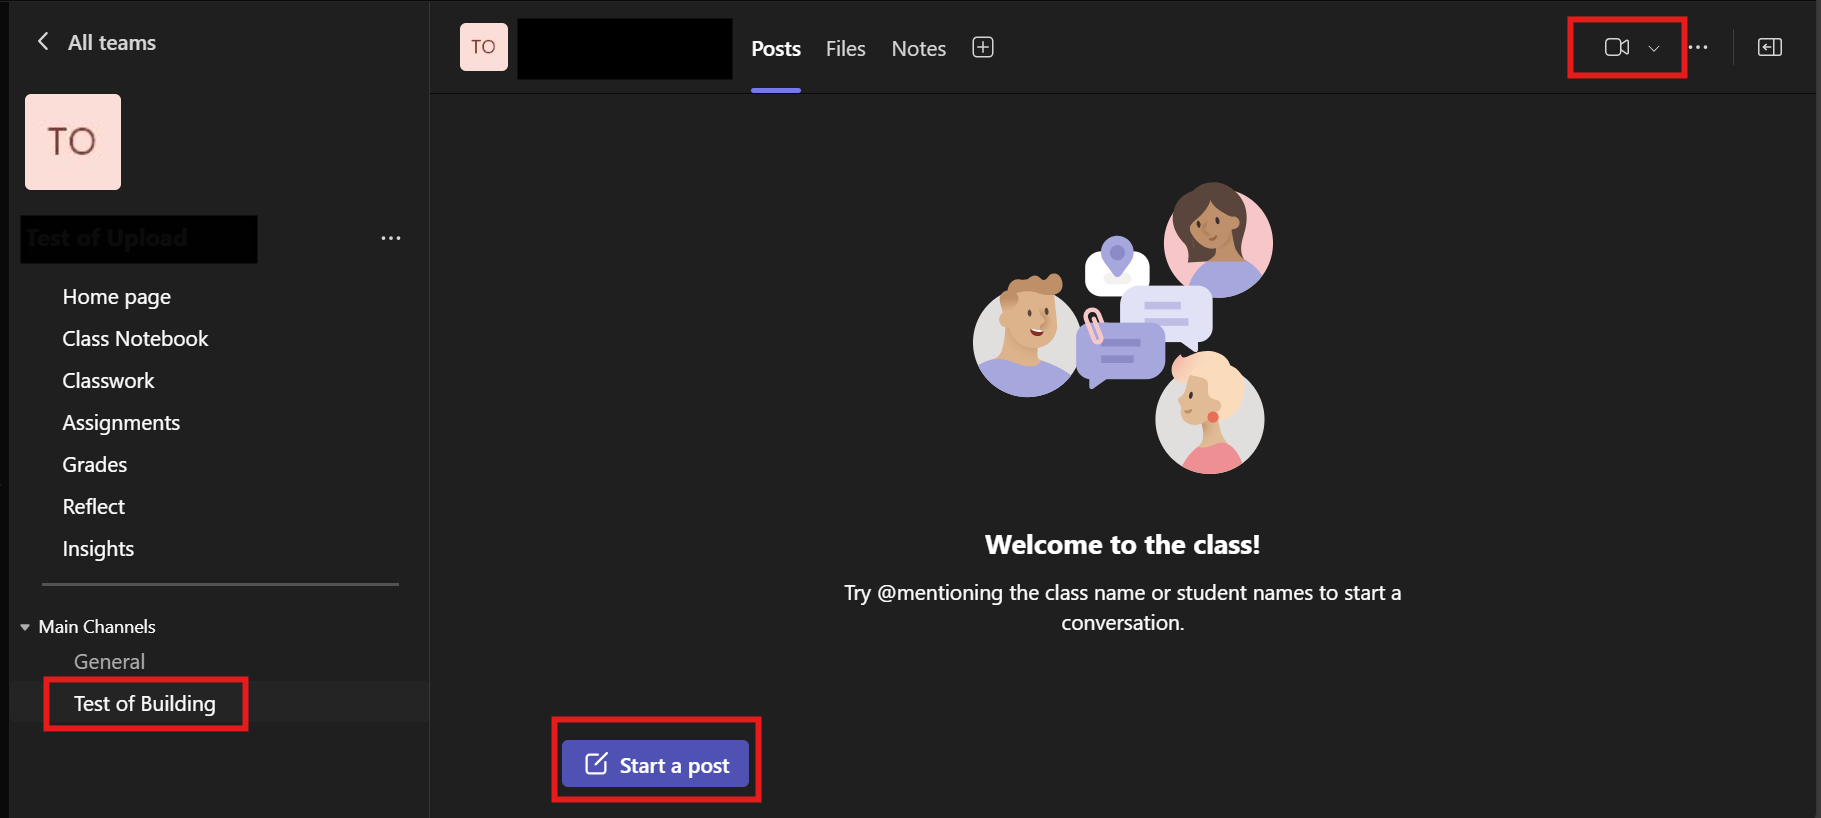
Note: Once the Channel is created, individuals within that Team space can interact with each other by selecting the channel under Main Channels.
Note: Any recordings made in the Meeting space will automatically be saved within the Channels chat section. The creator of the Team channels can also provide a direct link to the participants by following these steps. |
|