CROA Basics Overview
Estimated Reading Time: 13 Minutes| 2019 |
CROA Basics Overview
|
CROA is a system that allows you to pull data reports specifically for analytic purposes.�The data that is pulled is directly from Colleague, once a day.�� CROA is sometimes referred as BI or Business Intelligence. Everything in CROA has had the data validated.�� � This article will provide you with an overview of CROA including the following:
� Note: You are unable to access CROA from a laptop unless you are plugged�in, docked and on campus.� |
�
�
�
Video: CROA Basics Overview Captions (00:17:23)
�
�
Logging In
| 1.�Login�to Montco Connect (portal). | � | |
| 2.�Under the Tools Section�click CROA.�Login to CROA�using your College username and password.� |
� � � � |
|
|
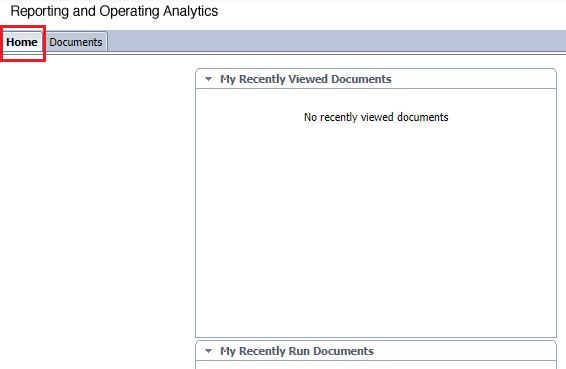
3.�Once logged in you will see the Home�page/tab (unless you have changed this landing page previously). You can change what you see upon login by updating your Preferences. Note:�You can also access CROA from reports.mc3.edu. |
�
� �
� � |
|
�
�
�
�
Setting your Preferences
| To change your Preferences so that when you open CROA it opens to a specific tab/page, setup your Preferences.� |
�
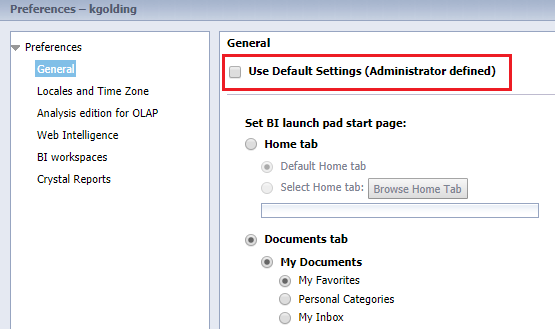
| 1.�Click Preferences in the upper right corner. A pop-up window will appear and take you to the General tab.� |
� �
� � |
|
| 2.�To change your�Default settings, uncheck Use Default Settings so you can�edit the�information�below to meet your needs.� |
� �
� � � |
|
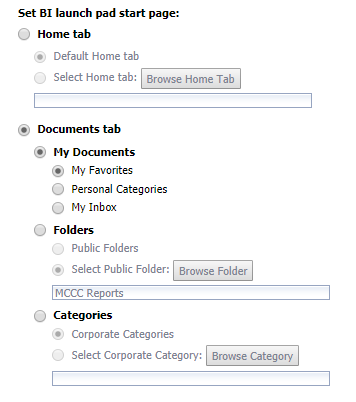
| 3.�Determine what you want your homepage to be (Home tab, Documents tab, Folders or Categories).�Select what information�within that tab you want to display (My Documents, My Favorites, etc.). | �
|
|
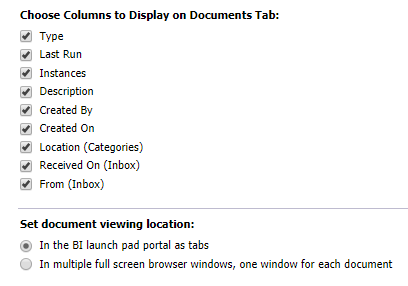
| 4.�Leave the information in Choose Columns to Display on Documents Tab and Set document viewing location: as the default. |
� � �
� � |
|
| 5.�Further down you can also set the maximum number of items per page. By�default�it is set to 100 items, however you can change this.� |
� � �
� � |
|
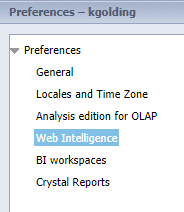
| 6.�Next, click the Web Intelligence link in the left navigation menu of the Preference window.� |
� � �
� � |
|
|
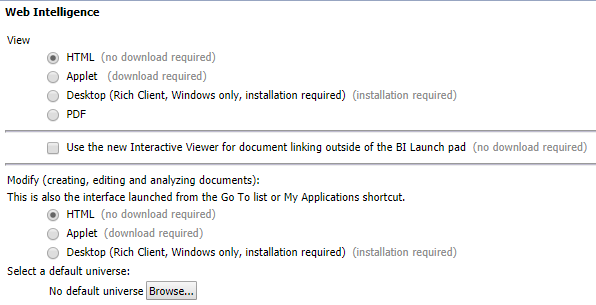
7.�Under�View and Modify�make sure HTML�is selected. If Applet is�selected�then you will need to have Java installed. Java is not installed on all computers across campus. The applet option can also cause you to see a blank screen when you try to open a report.� |
|
|
| 8.�Click Save and Close when you are finished. | �
|
|


�
�
�
�
Navigating CROA
| CROA contains a left navigation menu in addition to various items that are accessible in the Documents tab/page where you will be doing the majority of your work. |
�Left Navigation Menu
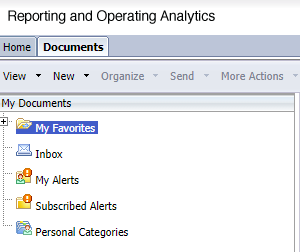
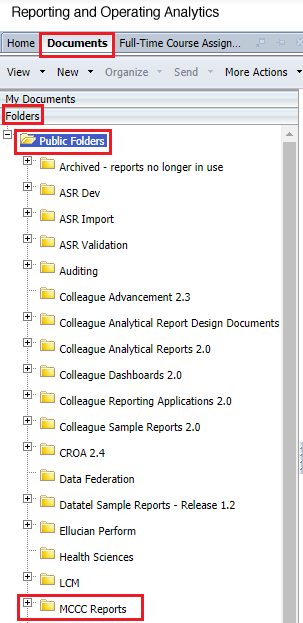
| 1.�Documents tab is where you will spend most of your time. You can�create folders�in your documents space�to organize�the�reports�you create or use frequently. MCCC Reports is where most people work out of.��
� Note: All reports in this area are from Ellucian or IT has created them.� |
� �
� � |
|
|
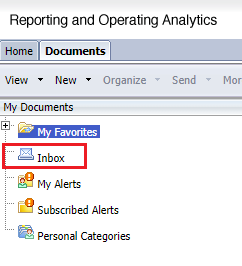
2.�Your�Inbox�is the space where you will find reports that others share with you. You should only share reports with others via CROA since they can contain sensitive information. Note: You are not notified when someone sends you a report.� |
|
|
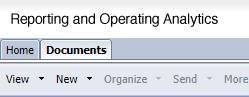
| 3.�There are additional gray tabs�below as well.�When you click on these�tabs�they will expand to show additional information within these areas.� |
� � �
�
� � � � |
|
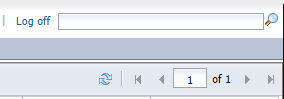
| 4.�To search for reports or information, use�the�Search bar in upper right corner as opposed to Search tab on the left�navigation�menu. The Search in left�navigation�menu sometimes does a search within a search. |
� � �
� � |
|

�
Documents Tab Navigation
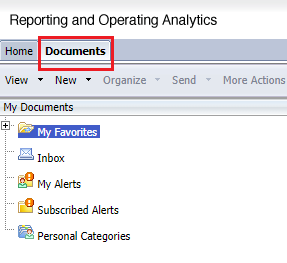
| 1. Click the Documents tab. |
� �
� � |
|
|
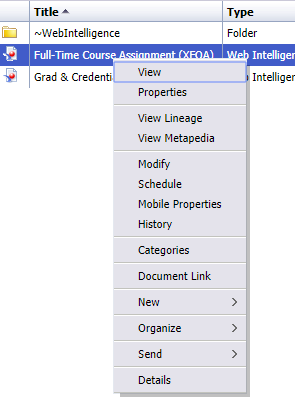
2.�Right click on a report to show a list of options.�
|
�
|
|
�
�
�
�
Open a Report
|
All reports are either from Ellucian or IT has created them. These reports pull information from Colleague which helps ensure accuracy, however, it is always good to open and review that reports have been updated.�� If you are unsure what report to open, hover over the report to see a report description. Note: Crystal Reports are reports indicated with a green dot. Crystal Reports show live data (I.e. Finance and Purge reports). Crystal Report must be created by IT.� � |
�
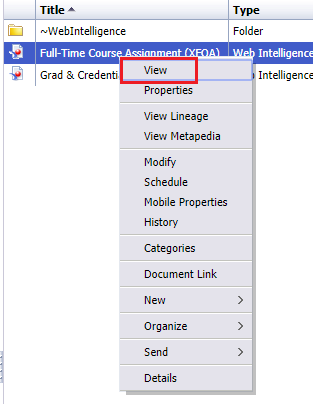
| 1.�Right mouse�click�on the report you want to open. Then click View.�
� Note: If you�open�a report that has a schedule attached it will open an Excel file that does not have the most up to date data. |
� �
� � � |
|
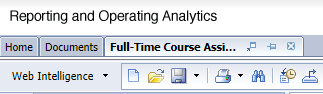
| 2.�When you open the�report�a new tab opens at the top (like a web browser).��
� Note: Some reports have multiple tabs. Be sure to check before you use or export the report because it will only give you the information on the current tab that you are viewing.� |
�
|
|
|
3.�When the report opens, look at the bottom right hand corner of the report to see the last time the data was refreshed.�Click the icon in the lower right corner of the report to refresh the data.�It’s important to always refresh the data when you open it.�� Note:�If it has a refresh of 5 years ago it does not mean it’s old�sometimes it means that�you do not have the ability to save.�Do not worry about the last time it was run, just make sure to refresh. Some reports set to refresh automatically. Some reports will just run. Some reports give you a list of prompts.� |
|
|
| 4.�You can also track changes in the report. This is optional based on your preferences.�Track Changes allows you to compare the report with the last data refresh so you can see report differences, however it is not always 100%. It is best to export the information and review it in Excel.��
� To Track Changes,�click the�Track Changes icon at the bottom�right corner�of the report. |
|
|


�
�
�
�
Reports with Prompts
| Some reports contain Prompts. You will know when a report contains prompts when you open the report. A pop-up window will appear asking you to either enter information or make you aware that specific information in the report is being used. |
�
|
1. When you open a report and a pop-up window appears that says Prompts then you will either be required or not required to enter information before the report runs. Required and not required prompts are identified by the following:
|
� � � � � �
� � � � � |
|
|
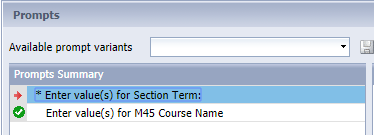
2. Prompts that require additional information involve you identifying what information you want to pull for said prompt. Click the prompt identified with the red arrow to select the value you wish to add to the report. |
�
|
|
|
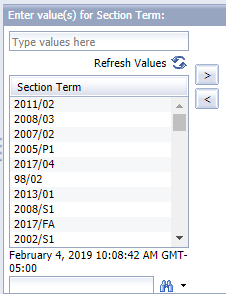
3.�Move over to the Enter value(s) for Section Term box to look for the value you want to add. You can use the search option at the bottom to search for values or click the heading, Section Term, to organize the values. Note: You can enter your own value manually, but if you do not type it correctly it will give you zero results. |
�
|
|
|
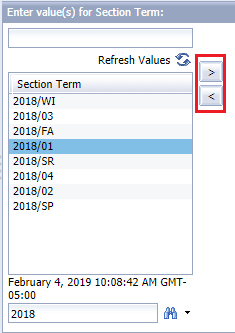
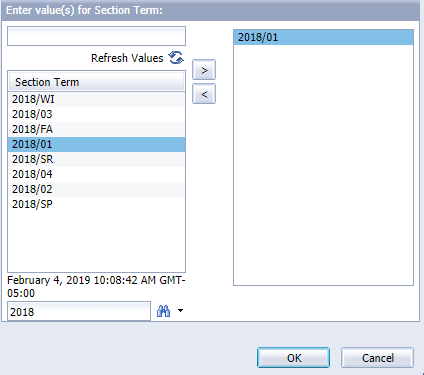
4.�Click the value you want to add in the Enter value(s) for Section Term window and use the arrows to the right of the box to move them into the blank box to the far right. Once you add the value, under the Prompts Summary box, the prompt you selected with the red arrow will now turn to a green check mark.�� Note: You can add more than one value to a prompt.� |
� � �
� � |
|
| 5.�When you are finished, click OK. This will run the report. |
� � �
� � |
|
| 6.�The report will now open in a Reading View. | � | |

�
�
�
�
Saving a Report
|
If you want to use a report, but make changes to it, you must save the report to your Favorites folder first. You are unable to edit public reports.� Note: It is recommended that you do not create a report from scratch. Find a report that is close to what you want and make edits to the existing report.� |
�
| 1.�Click the small down arrow next to the Save icon in the upper left corner. Then click Save As.�
� Note: The save icon may not work if you are currently in MCCC Reports. |
� � �
� � |
|
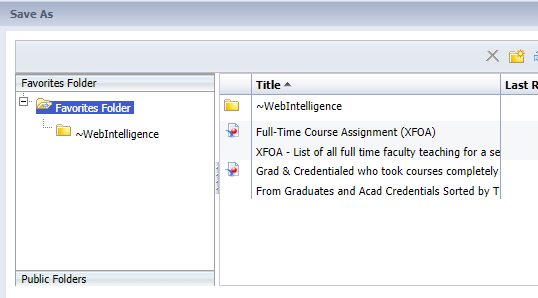
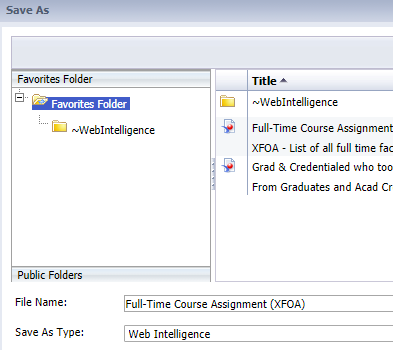
| 2.�Click Favorites (if not selected already) and find a folder to save it into or create a new folder to save it in.� |
� �
� � |
|
| 3. Give the report a new name if you wish.�Under type, make sure Web Intelligence is selected. Be sure to provide keywords and a description so the report is easier to locate when performing a Search.�
� Note: Web Intelligence will always be your option when saving.� |
�
|
|
|
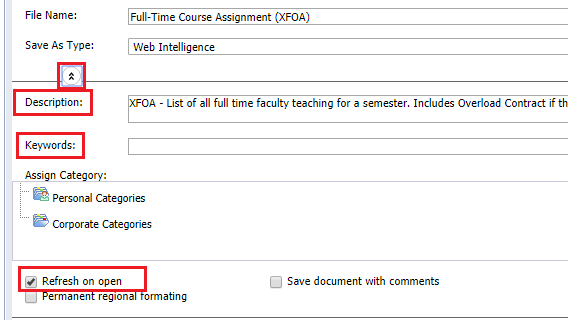
4.�Click the small arrows pointing to the right to expand your options. Enter a Description and Keywords. This helps when it comes to searching and identifying a report. You can also check the box next to Refresh on Open. You do not have to select this option if you prefer to see information from the day before versus the information on the current. day. |
|
|
| 5.�When you are finished, click Save.� | � | |

�
�
�
�
Edit a Report
| You can only edit a report that is in your Favorites folder. For directions on how to save a report that you want to use, please refer to�section above, Save a Report. |
�
|
1.�Locate and click the report you want to make changes to. Most reports you will be looking for are under Documents, then Folders, Public Folders, and�MCCC Reports.� Note: If you are creating a new report, it is recommended that you find a report that is close to what you want and then edit the�information�so you are not creating a report entirely from scratch. |
� � �
� � |
|
|
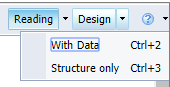
2.�Open the report and click�small down arrow to the right of the�Design�icon. For your reference, there are 2 design views:
For this example, click With Data. Note: If you need to make changes to a report you will be unable to see a Design option if the report is not saved.� |
|
|
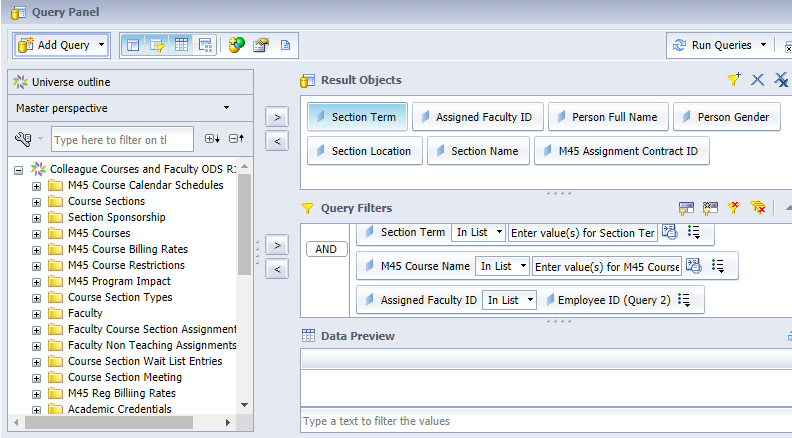
| 3.�Click the�Data Access�tab located in the upper left corner of the report. Then�click the Edit Data button. A pop-up window will appear that shows the Result Objects and Query Filters.� |
� � �
� � � |
|
|
4.�Report options that can be edited are as follows:
Note: M45 is common to see for Query Filters and Result Object options. M45 is the Customer number for Ellucian. Always pick M45 since Colleague is customized for the College. |
�
�
� |
|
|
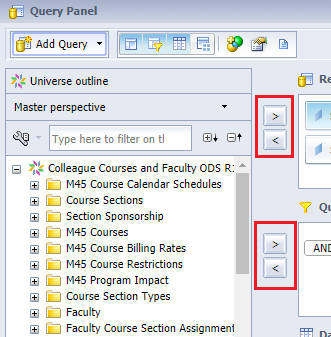
5.�Click the information you want and use the respective arrows to the right of the box to move it into the area you wish.�� Note:�You can use the search feature in the panel to the left to search for fields or you can click on an existing field and it will take you to the folder where it lives.�� |
�
|
|
|
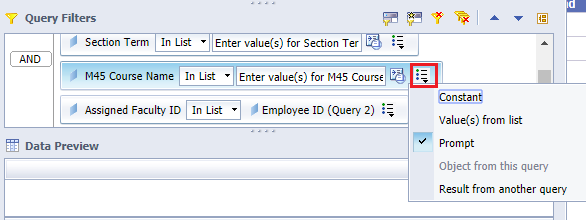
6.�Under Query Filters you do have the ability to define your filter type. Click the icon next to the filter you want to define. From the drop down, select Constant (if this should remain as is), Values from List (select a value that should be used), or Prompt (if you want to be prompted to enter the information prior to the report running).� |
�
|
|
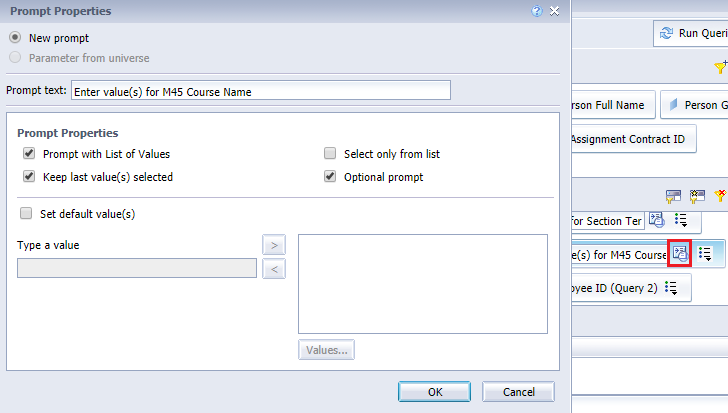
| 7.�You can also edit the Prompt Properties. A pop-up window will appear where you can define the properties. If Optional Prompt is not�selected�then users of this report will be required to enter a prompt.� |
� � � �
� � � |
|
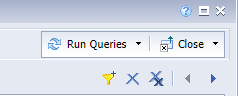
| 8.�When you are finished, click Run Queries in the upper right corner. |
� �
� � |
|
| 9.�If you added or changed the�Result Objects of the report then�you will need to add those new fields into the report.� | � | |
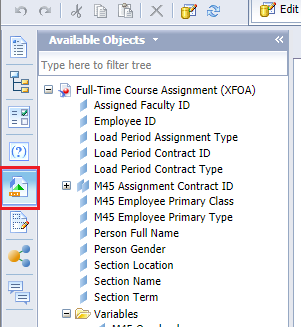
| 10.�Click the Available Objects icon from the left navigation panel.� |
� �
� � � |
|
| 11.�To add the new fields to the report right click on the first line of the data where you want to add the new field, click Insert, then Columns to the Left/Right (depending on where you want it). Then go back to your Available Objects panel and drag and drop it into the first blank link of the data field of the column you just added.� | �
|
|
| 12.�Once you have the report where you want, click Save As to make sure you are saving it where you want it.�It is recommended that you save reports as Save As in case you have multiple versions of the same type of report.��
� Note:�As you create and update reports on your own, be sure to validate the data that is within the reports with what you see on Colleague and on your report.�Any report�validating requests�can be sent�to�the�Help Desk�at�[email protected].� |
� | |
 �
�

�
�
�
�
Export a Report
|
You can export a report to view the data more closely if you wish.� Note: Do not export a report and send it via email. It is not the most secure option. |
�
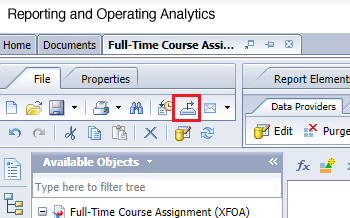
| 1.�Click�the�icon�that looks like a piece of paper with an arrow coming out pointing to the right.� |
� �
� � |
|
| 2.�Determine what data from the report you want to export.� | � | |
|
3.�Select CSV�or Excel. CSV removes the report formatting and Excel keeps the report formatting.��� Note: Do not export a report and send it via email. It is not the most secure option. |
� | |
�
�
�
�
Sharing a Report
| You have the ability to share reports with other users. Be sure to only share reports via the CROA system. This is the most secure option. |
�
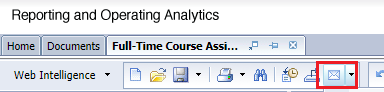
| 1.�Click the icon that looks like an envelope.� |
� �
� � |
|
|
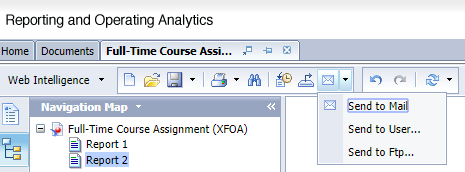
2.�Select Send from User. This option will send the report via CROA so that it is delivered to their CROA Inbox.�� Note: It is recommended that your share reports via CROA as this is the most secure way of sharing data.� |
�
|
|
|
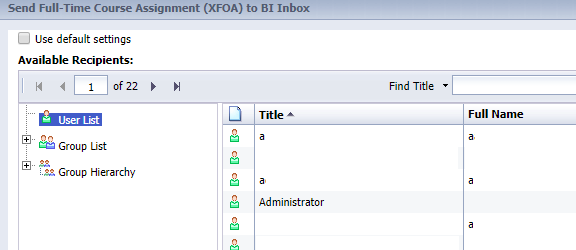
3. Click the user you want to send the report to. Use the arrows to move the recipient names over to Selected Recipients box. The system searches by the users College username. |
� �
� � |
|
|
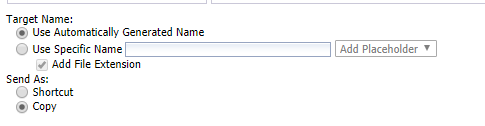
4. Leave Target Name and Send As: as the default option. Then click Send.� Note: The user you send the report to is not notified that you have send a report. It is recommended that you follow up via email to let the person know that you have shared a report in CROA.� |
�
|
|