| 2019 |
|
Once logged into Student Self-Service,select Student Planning and choose Plan & Schedule |
|
|
Note: Plan and Schedule allows you to create a schedule several semesters out based on the courses you have selected in My Progress. In addition, you can compare it to a timeline view and advising suggestions. |
|
|
Note: Through this view, you can:
|
If you would like to watch a video about the Plan & Schedule tab, click here .
Schedule Tab |
|
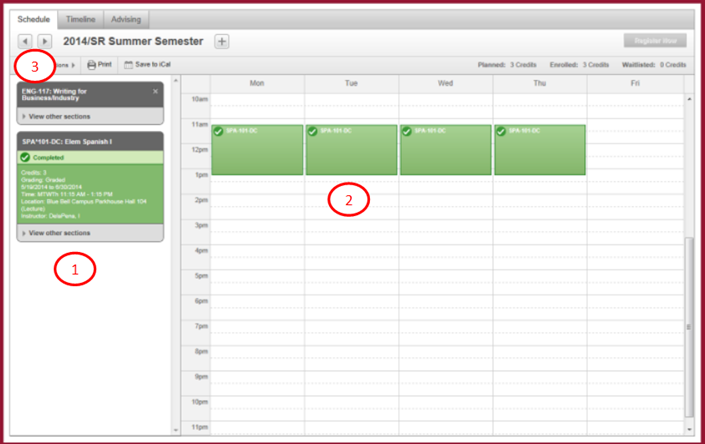
Contains: 1. Course Information 2. Day view of your schedule 3. Scroll to other semesters |
 |
|
|
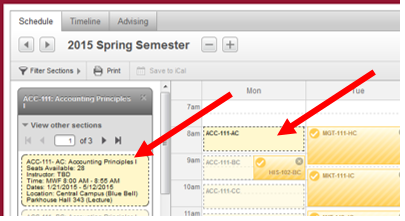
On the Schedule Tab 1. To see sections of the courses you have chosen, click on View other sections Note: Be mindful that there may be more than one page of sections! |
|
|
|
2.You can then click on a section you would like to add to your schedule. Note: A confirmation window will pop up. You can either click on the section on the left hand side OR click on the section on the actual calendar. In the new window, click the Add Section to Schedule button. |
 |
|
| 3.Once you have confirmed that you want to add the section to the schedule, you can continue in selecting other course sections. Note: If you decide to change your mind, you can always hit the X in the upper right hand corner and it will remove the section from your schedule. Note: As you go course by course and section by section, you can see your schedule visually building itself! |
||
| 4.Once you have mapped out all your classes, review the selections | ||
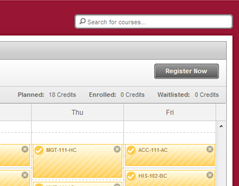
| 5.To register for the classes, click Register Now button. |  |
|
Note : The Timeline tab provides another visual for you corresponding to each term and what term each course should be taken to graduate at X date.
Note: In the Advising tab, you can send a quick note to your assigned advisor to ensure that you are registered for the right classes for next semester
*** It is recommended that you use email or phone communication with your advisor rather than the Notes area of Student Educational Planning ***
Article ID: 269
Created: September 30, 2014
Last Updated: January 28, 2024
Author: Jennifer Scales
Online URL: https://kb.mc3.edu/article.php?id=269